
Transforming your living space doesn’t have to mean breaking the bank at high-end furniture showrooms. In fact, some of the most charming, soulful homes across America right now are being shaped by the weekend maker movement. Whether you are looking to breathe fresh life into a tired room, embrace sustainable living, or simply enjoy the grounding satisfaction of working with your hands, thoughtful DIY crafting has taken center stage.
From modern textural art pieces to upcycled accents that tell a story, here is a curated guide to the most inspiring, achievable, and visually stunning DIY home and garden projects to try this season.
Elevating Your Space with Intentional Design
The modern American aesthetic has shifted dramatically away from mass-produced perfection. Today, we crave character, warmth, and individuality. Crafting your own decor allows you to tailor every single piece to your exact color palette and spatial needs, ensuring your home feels deeply personal rather than like a catalog page.
- Sustainable Upcycling: Giving old materials a second life reduces household waste while introducing rich, rustic textures that brand-new items simply lack.
- Biophilic Touches: Bringing organic elements, natural wood tones, and living greens indoors bridges the gap between your interior spaces and the great outdoors.
- Textural Depth: Monochromatic color schemes paired with heavy textures—like plaster finishes, woven fibers, and raw linens—create an expensive, designer look on a modest budget.
Project 1: The Modern Plaster-Textured Canvas
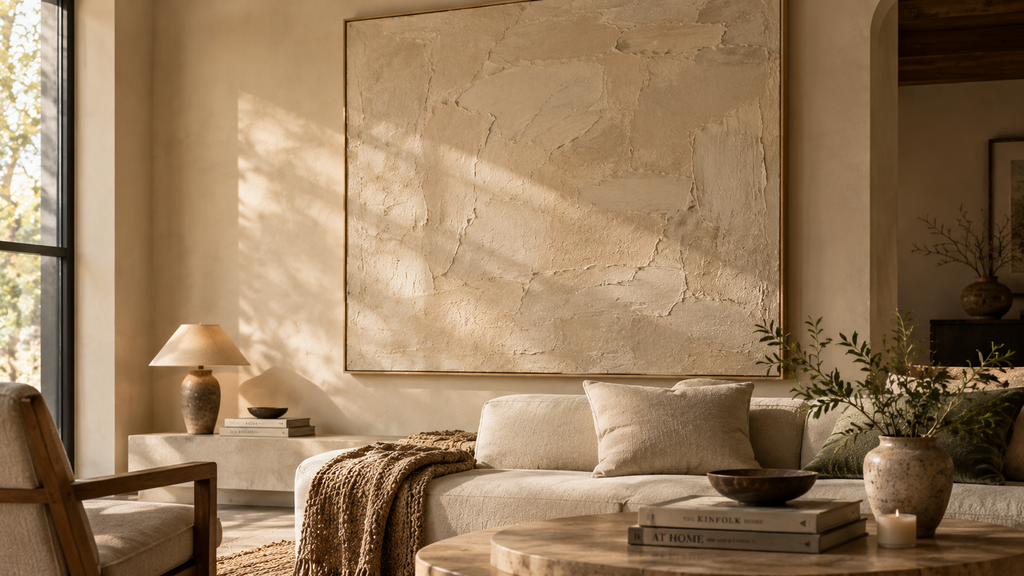
Mass-produced wall art can often feel cold and impersonal. Creating your own large-scale abstract canvas allows you to dictate the mood of your living room or entryway while mastering a surprisingly easy medium.
Materials Needed:
- A blank stretched canvas (size of your choice, 24×36 inches works wonderfully)
- Interior wall joint compound or lightweight plaster
- A plastic putty knife or notched trowel
- Matte acrylic paint in your choice of neutral tone (warm beige, soft terracotta, or muted olive)
Step-by-Step Execution:
- Apply the Base: Scoop a generous amount of joint compound onto the center of the canvas.
- Create Movement: Using your putty knife or the notched edge, sweep the compound across the surface in sweeping, organic arcs or cross-hatch motions. Don’t strive for perfection; the imperfections create stunning shadow play when hit with natural light.
- Curing: Allow the canvas to dry completely in a well-ventilated space for 24 to 48 hours until the plaster turns completely opaque and hard.
- Paint and Seal: Once fully dry, coat the entire piece uniformly with your chosen matte acrylic paint. The paint unifies the texture, transforming a simple canvas into a high-end sculptural statement piece.
Project 2: Fluted Wooden Accent Tables
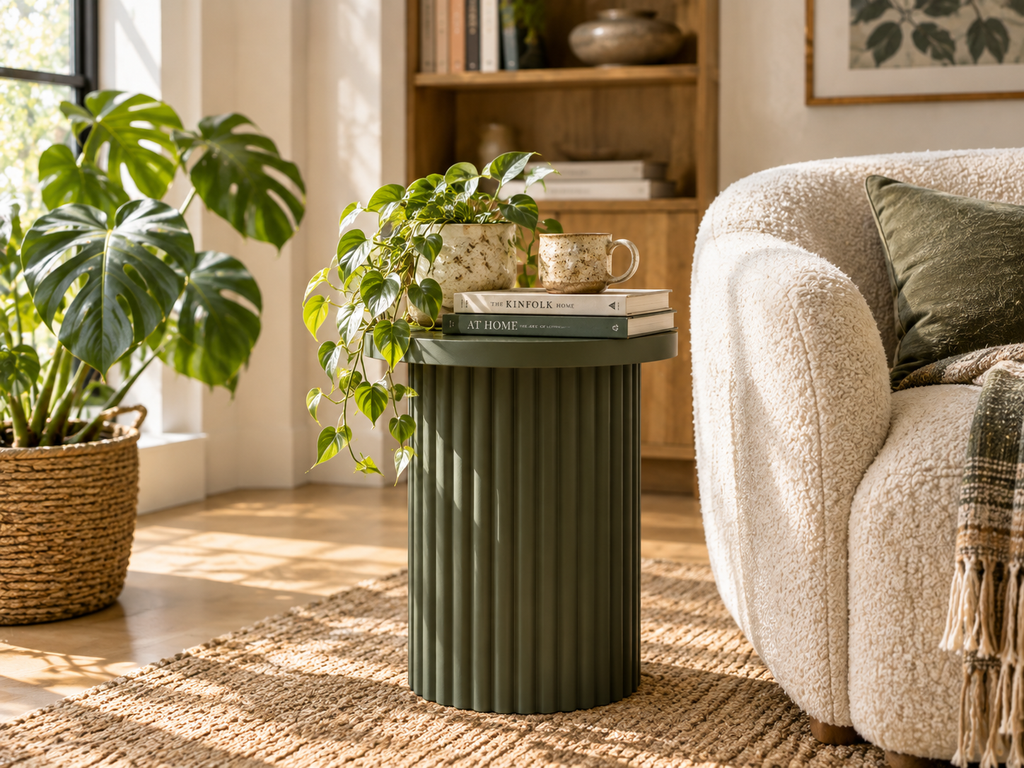
Fluted and ribbed furniture is having a massive moment in modern interior design, frequently commanding high-end retail prices. You can achieve this exact high-end look by upcycling a basic thrift store side table or an inexpensive flat-faced nightstand.
Materials Needed:
- A plain round or square wooden side table
- Half-round wooden dowels (cut to the height of your table’s base)
- Wood glue and a fine-toothed hand saw or miter saw
- Liquid nails or a brad nailer
- Primer and satin-finish paint of your choice
Step-by-Step Execution:
- Measure and Cut: Measure the height of your table’s base or perimeter. Cut your half-round wooden dowels precisely to fit that exact height using a saw.
- Attach the Dowels: Apply a thin line of wood glue down the flat back of each dowel and press it firmly against the table base. Butt them tightly side-by-side all the way around the circumference.
- Secure: Use painter’s tape to hold sections tightly in place while the glue sets overnight, or secure with small brad nails if working with solid wood.
- Finish: Fill any minor gaps with wood filler if necessary, sand lightly, prime, and paint in a rich color-drenched hue to instantly elevate the piece into a custom designer item.
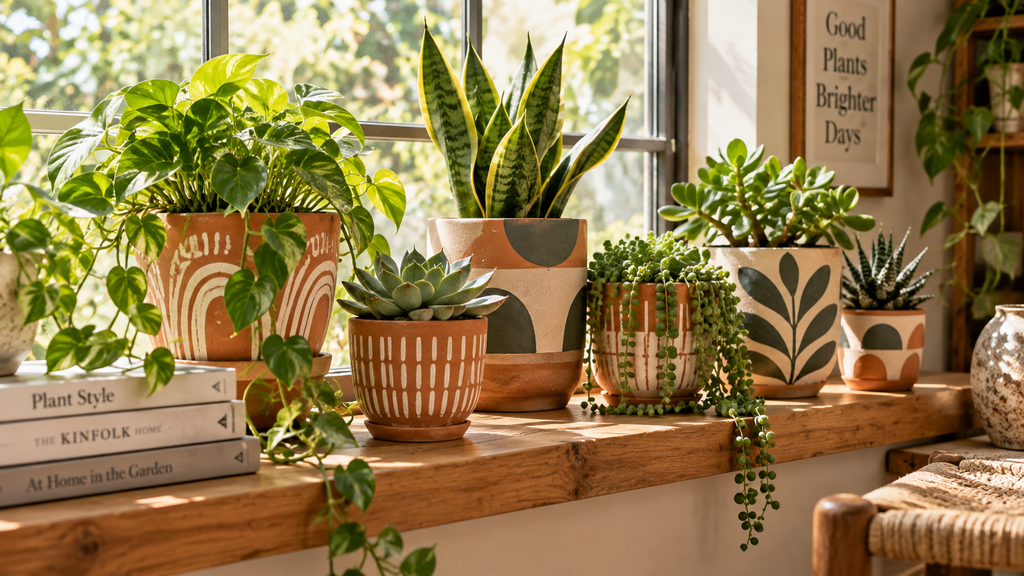
Houseplants are essential for a healthy home environment, but standard orange-red terracotta pots can sometimes look a bit plain. Upgrading them with geometric patterns or earthy color blocks bridges rustic charm with contemporary style.
Materials Needed:
- Standard terracotta pots with drainage saucers
- Acrylic or chalk paint in muted, earthy tones
- Painter’s tape for clean lines
- Foam brushes and detail paintbrushes
- Clear matte acrylic sealer spray
Step-by-Step Execution:
- Prep the Pots: Soak your terracotta pots in water for 20 minutes and let them dry completely. Terracotta is porous; sealing out moisture prevents the paint from bubbling later.
- Tape and Pattern: Apply painter’s tape around the pot to create sharp geometric blocks, stripes, or diagonal divides.
- Paint: Apply two thin coats of chalk paint within your taped sections. Peel the tape away carefully while the second coat is still slightly damp to ensure razor-sharp edges.
- Seal: Once thoroughly dry, spray the exterior with a clear matte sealer to protect your handiwork from moisture rings and soil stains during watering.
Pro-Tips for Sourcing Materials and Maximizing Success
Tackling home DIY projects successfully relies as much on preparation as it does on execution. Keep these core principles in mind to ensure your handmade creations look professionally made:
- Invest in Quality Basics: While saving money is a primary perk of crafting, never cheap out on glues, tapes, or primers. Premium painter’s tape and industrial-strength wood glue are the secret differences between a project that lasts for years and one that falls apart in weeks.
- Embrace the Process: Handcrafted items carry the unique fingerprint of their maker. Minor asymmetries or organic variations are not flaws—they are proof that a human hand poured care and creativity into the item.
- Safety First: Always wear appropriate personal protective gear, such as dust masks when sanding drywall compound or safety glasses when operating saws.
Taking on a weekend crafting project connects you deeper to your living space, turning a standard house into a personalized, narrative-rich home. Gather your supplies, clear off a workspace, and enjoy the rewarding process of building something entirely your own.