
A beautiful home does not have to be filled with expensive furniture or designer decorations. Sometimes, the smallest handmade details are what make a space feel warm, comfortable, and truly personal.
A painted flowerpot, a handmade wall hanging, a simple rope basket, or a decorated picture frame can completely change the feeling of a room. The best part is that many DIY home decor crafts can be made with inexpensive supplies, thrift-store finds, or items you already have around the house.
You also do not need to be an experienced crafter. With a few basic materials, a little patience, and a free afternoon, you can create useful and attractive pieces for your living room, bedroom, kitchen, entryway, or home office.
If you love cozy interiors, farmhouse style, natural textures, or simple modern decor, these DIY projects are easy to customize. Choose colors that match your home, reuse items whenever possible, and enjoy the process instead of worrying about making everything perfect.
Here are 10 easy DIY home decor crafts that can make your home feel more inviting without spending a fortune.
1. Make a Textured Vase From an Old Glass Container
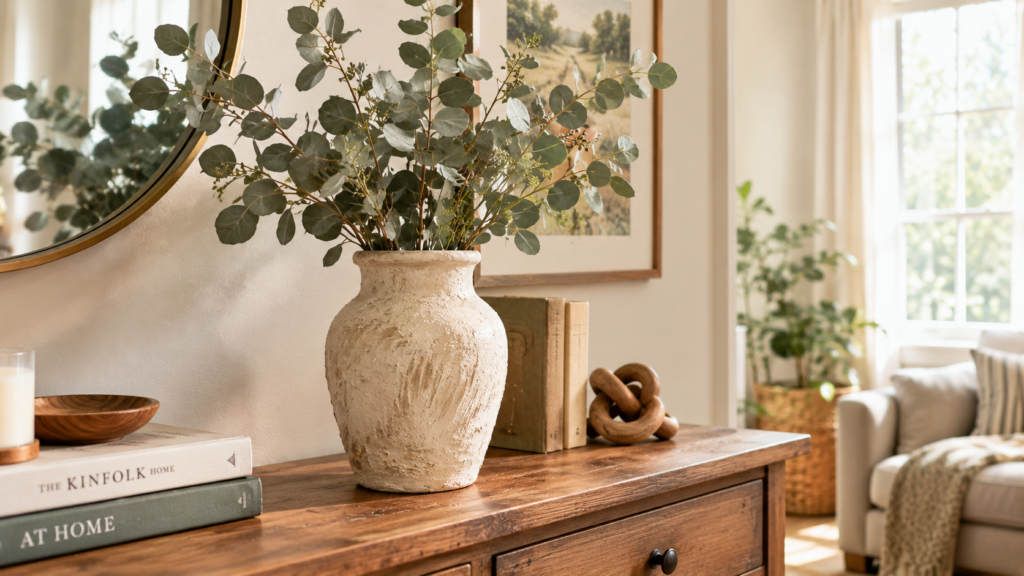
One of the easiest DIY home decor projects is transforming an ordinary glass vase, jar, or thrift-store container into a beautiful textured vase.
You can create a soft, stone-like finish that looks more expensive than the original item. This project works especially well with neutral home decor, modern farmhouse interiors, and earthy living spaces.
Supplies You Need
- Old glass vase or clean jar
- Acrylic paint
- Baking soda
- Small paintbrush
- Fine sandpaper
- Optional matte sealer
How to Make It
Start by washing the container and allowing it to dry completely. Mix acrylic paint with a small amount of baking soda until the mixture becomes thick and creamy.
Apply the mixture to the outside of the vase using a paintbrush. You may need two or three thin coats to create an even finish. Let each coat dry before applying the next one.
Once the paint has dried, gently sand a few areas around the edges to create a slightly aged appearance.
Cream, beige, warm white, taupe, and muted terracotta are beautiful color choices. Fill the finished vase with dried flowers, eucalyptus stems, faux branches, or fresh flowers.
Storage baskets are useful in almost every room, but attractive woven baskets can sometimes be expensive. A simple plastic basket or sturdy cardboard box can be turned into a stylish rope basket with just a few supplies.
This project is perfect for storing blankets, towels, toys, magazines, or shoes.
Supplies You Need
- Plastic basket or sturdy box
- Cotton rope or jute rope
- Hot glue gun
- Glue sticks
- Scissors
- Optional fabric for the inside
How to Make It
Begin at the bottom of the basket. Add a small line of hot glue and press the rope into place.
Continue wrapping the rope around the basket, adding glue in small sections as you work. Keep the rows close together so the original basket does not show through.
When you reach the top, cut the rope and secure the end carefully. If you want a softer finish, add a fabric liner inside the basket.
Cotton rope creates a soft, clean look, while jute rope gives the basket a rustic or coastal appearance.
Place the finished basket beside your sofa, under a console table, near the entryway, or at the end of your bed.
3. Turn a Plain Terracotta Pot Into a Decorative Planter
Terracotta pots are affordable and easy to find, but they can look even more beautiful with a simple painted design.
This craft is a lovely way to add personality to your indoor plants, porch, kitchen windowsill, or backyard garden.
Supplies You Need
- Terracotta pot
- Acrylic paint
- Small paintbrushes
- Painter’s tape
- Clear sealer
- Indoor or outdoor plant
How to Make It
Clean the pot and allow it to dry. Use painter’s tape to create stripes, arches, checks, dots, or geometric shapes.
Paint the exposed areas and let the paint dry before removing the tape. You can also use a small brush to add simple hand-painted leaves, flowers, or abstract patterns.
For a calm and natural look, choose colors such as cream, sage green, clay, soft blue, or charcoal.
If the pot will be placed outdoors, use paint and sealer suitable for exterior conditions. Make sure the pot has proper drainage so your plant’s roots do not stay in water.
A collection of three painted pots in different sizes can create a charming display on a shelf or sunny windowsill.
4. Make a Simple DIY Wall Hanging
A handmade wall hanging can fill an empty wall without making the room feel crowded. This project is especially suitable for bedrooms, reading corners, home offices, and small apartments.
You can create a wall hanging using yarn, cotton cord, wooden beads, and a small wooden dowel.
Supplies You Need
- Wooden dowel or smooth stick
- Cotton cord or thick yarn
- Scissors
- Wooden beads
- Optional wooden ring
How to Make It
Cut several pieces of cord to the same length. Fold each piece in half and attach it to the wooden dowel using a simple loop knot.
Trim the bottom edges into a straight line, angled shape, or soft curve. Add wooden beads to a few strands for extra texture.
For a more natural look, use cream, oatmeal, beige, rust, or soft brown yarn. If you prefer a colorful design, choose shades that match your room’s pillows, curtains, or artwork.
Hang the finished piece above a nightstand, beside a reading chair, or on a small blank wall.
The slightly imperfect texture is part of the charm, so do not worry about making every strand exactly the same length.
5. Design a Personalized Gallery Wall
A gallery wall is an easy way to make your home feel more personal. Instead of buying expensive artwork, you can use family photos, printable art, postcards, children’s drawings, pressed leaves, or meaningful notes.
Supplies You Need
- Picture frames
- Photos or artwork
- Measuring tape
- Painter’s tape
- Pencil
- Picture hooks or removable hanging strips
How to Make It
Begin by arranging the frames on the floor. Try different layouts before deciding which arrangement works best.
A grid layout creates a clean and organized appearance. A mixed arrangement with different frame sizes feels more relaxed and collected.
Use painter’s tape to mark the outer edges of the arrangement on the wall. This gives you a chance to adjust the design before hanging the frames.
For a coordinated look, choose frames in similar colors such as black, white, natural wood, or gold.
You can create a gallery wall around a theme, such as family memories, travel photographs, botanical prints, or black-and-white photography.
6. Create a Handmade Candle Display
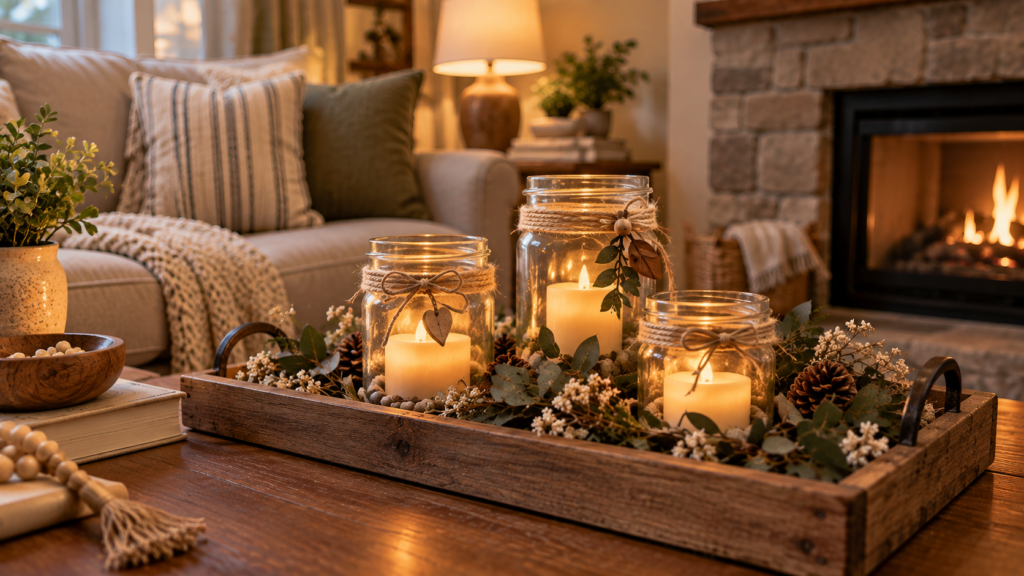
Candles instantly make a room feel warm and comfortable. A simple handmade candle display can add a cozy touch to a dining table, mantel, bathroom counter, or bedroom shelf.
Supplies You Need
- Heat-safe glass jars or containers
- Battery-operated candles
- Decorative sand or small stones
- Ribbon or twine
- Optional paint
How to Make It
Clean and dry the containers. Add a small amount of decorative sand or stones to the bottom if the container is suitable for that purpose.
Place a battery-operated candle inside and decorate the outside with twine, ribbon, or a small painted detail.
LED candles are a practical option because they provide a warm glow without an open flame. If you use real candles, make sure the container is heat-safe and keep all fabric, paper, dried flowers, and other flammable materials away from the flame.
Create a group of three candle holders in different heights for a simple centerpiece.
7. Upcycle an Old Picture Frame
Before throwing away an old picture frame, consider giving it a fresh finish. A simple coat of paint or stain can make an outdated frame look completely different.
This project is inexpensive and works well with thrift-store frames, damaged frames, or frames that no longer match your decor.
Supplies You Need
- Old picture frame
- Fine sandpaper
- Paint or wood stain
- Paintbrush
- Optional clear sealer
How to Make It
Remove the glass and artwork from the frame. Lightly sand the surface so the new finish can adhere properly.
Paint the frame in a color that works with your room. Cream, black, natural wood, muted green, and warm brown are easy colors to style.
For a vintage appearance, gently sand the edges after the paint dries. You can also use two colors to create a layered finish.
Use the updated frame for family photographs, artwork, children’s drawings, or a small mirror.
A group of matching frames can make a hallway or staircase feel more finished.
8. Make a No-Sew Fabric Cushion Cover
Changing throw pillows is one of the quickest ways to refresh a living room or bedroom. Instead of buying new pillow covers, you can make a simple no-sew version using fabric and fabric glue.
Supplies You Need
- Decorative fabric
- Existing throw pillow
- Fabric scissors
- Fabric glue
- Measuring tape
- Iron
How to Make It
Place the fabric flat and measure it around the pillow. Leave enough extra fabric to create overlapping sections at the back.
Fold and glue the edges to prevent fraying. Wrap the fabric around the pillow like a simple envelope and secure the overlapping sections with fabric glue.
Allow the glue to dry fully before using the cover.
Linen-look fabric, cotton, canvas, and soft textured materials work well for this project. Choose a pattern that complements your existing furniture rather than competing with it.
This is a great way to introduce seasonal colors without completely changing your room.
9. Make a Pressed-Flower Art Frame
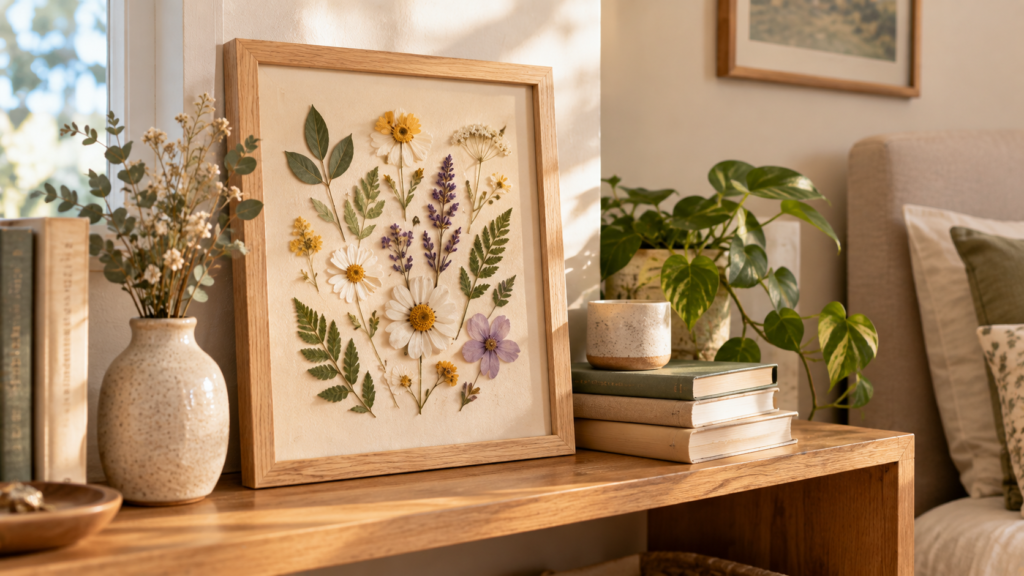
Pressed flowers are a beautiful way to bring a little of the outdoors into your home. You can use flowers from your garden, wildflowers from a walk, or small leaves collected during a nature outing.
Supplies You Need
- Small flowers or leaves
- Heavy books
- Absorbent paper
- Cardstock
- Picture frame
How to Make It
Place the flowers between two sheets of absorbent paper and put them inside a heavy book. Leave them for several days until they are completely dry.
Arrange the pressed flowers on cardstock. You can create a simple symmetrical design or a more natural arrangement.
Once you are happy with the layout, place the artwork inside a frame.
This project looks lovely in bedrooms, entryways, home offices, and reading corners. Handle the dried flowers gently because they can be fragile.
10. Build a Small Entryway Organizer
An entryway organizer can help keep keys, mail, sunglasses, and small everyday items in one place. You can make a simple version using a wooden board, hooks, and a small shelf.
Supplies You Need
- Wooden board
- Small hooks
- Screws
- Wall anchors
- Drill
- Sandpaper
- Paint or wood stain
How to Make It
Sand the wooden board until the surface is smooth. Paint or stain it and allow it to dry completely.
Attach the hooks evenly across the lower part of the board. If you want extra storage, add a small shelf above the hooks.
Use suitable wall anchors and hardware for your wall type. Make sure the organizer is securely attached before placing items on it.
You can personalize the organizer with a small label, painted design, or family name. Keep the design simple so the finished piece remains useful and attractive.
Place it near the front door to create a practical drop zone for everyday essentials.
Simple Ways to Make DIY Decor Look More Expensive
The final appearance of a craft often depends on the finishing details rather than the cost of the supplies.
Use a Limited Color Palette
Choose two or three colors that work well together. Neutral shades, natural wood, soft green, and muted earth tones are easy to combine.
Focus on Texture
Rope, linen, wood, ceramic, dried flowers, and woven materials add depth to a room without making it look busy.
Keep Displays Balanced
Avoid placing too many handmade objects in one area. One larger piece with two smaller accents often looks more intentional.
Take Time With the Finish
Remove loose threads, clean up glue strings, smooth rough edges, and allow paint to dry completely.
Mix Handmade Items With Everyday Decor
DIY pieces look most natural when displayed with books, plants, candles, photographs, and useful storage items.
Basic DIY Craft Safety Tips
Before starting any project, keep these simple safety tips in mind:
- Use hot glue guns carefully.
- Keep sharp scissors, drills, and tools away from children.
- Work in a well-ventilated area when using paint or sealer.
- Wear eye protection when drilling or sanding.
- Follow the instructions on adhesives and finishing products.
- Use heat-safe containers for real candles.
- Keep open flames away from fabric, paper, and dried flowers.
- Use suitable wall anchors for shelves and hanging organizers.
- Let painted and sealed items dry completely before bringing them indoors.
Final Thoughts
DIY home decor crafts are a simple way to make your home feel more comfortable, creative, and personal. You do not need a large budget or a professional craft room to get started.
Begin with one small project that fits your style and available time. Reuse old jars, thrift-store frames, fabric scraps, and wooden pieces whenever possible. The finished item does not need to be perfect to be meaningful.
A handmade vase can brighten a shelf. A rope basket can solve a storage problem. A pressed-flower frame can preserve a special memory. These small details can make everyday spaces feel more like home.
The most important part of DIY crafting is enjoying the process. Choose materials you love, experiment with colors and textures, and create pieces that reflect the people who live in your home.